Pages

Sunday 22 March 2015

Ribbons and Pearls – Crafting Musketeers Challenge #23


Hi Everyone

Welcome to my half-way project for Challenge #23, the theme is "Ribbons and Pearls"  and the sponsor for this month is the fabulous Crafty Ribbons

Here is a little bit about them.

"If you buy any more ribbon, you will have to sell some to get the money" 
This chance remark in 1996 was the catalyst that prompted Ali to start Crafty Ribbons, which she runs together with her husband Tony. Crafty Ribbons aim is to offer ribbon lovers and crafters a wide, varied and interesting choice from some of the worlds best ribbons, at affordable prices. We also design and manufacture our own range of ribboncraft kits, including ribbon embroidery, weaving, mitred patchwork, teddy bears, and cushions.

Product Image

Crafty Ribbons operates out of its own modern warehouse building, situated on the outskirts of Blandford Forum in Dorset, England. It is an Aladdins cave of delights. We believe that down Tin Pot Lane  is probably to be found one of the finest collections of ribbons available.
Primarily we sell our ribbons from comprehensive displays, on stands at the major retail shows in the UK and France associated with hobbies and crafts, including sewing, knitting, needlecraft, embroidery, quilting, card making and scrapbooking.
So welcome to the wonderful and versatile world of ribbons -  silks, satins, sheers, ombres, wire edge and much much more - A true Ribbon Emporium.

Product Image

The Crafty Ribbons lorry... probably one of the largest wrapped parcels ever. If you see us out and about, give us a wave

And the prize is a £10 voucher .

Here’s my project….

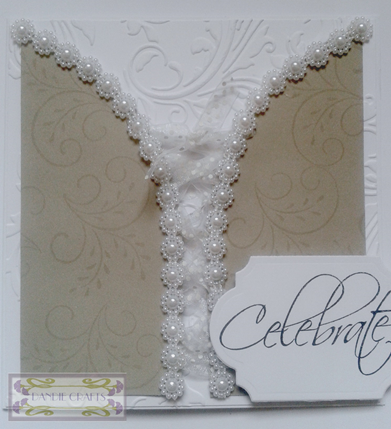
This time I have kept it nice and simple for a wedding congratulation card using the fab spotted organza ribbon from Crafty Ribbons.  Their ribbons are fantastic quality and they have a huge selection of designs to choose from.

I have take a 6” square card blank.  Cut a piece of white card to 5 3/4” square and embossed it with a folder and glued in place.  Next take some grey paper cut to 5” square and cut it in half and then with the two pieces together I cut an arch shape. Using a hole punch and measuring evenly along each curved edge, punch the lacing holes.  Stamp the swirl image using Versamark to give a watermark look.Glue the panels into position on card front leaving the curved edge free.  Lace the ribbon through the holes.  Add pearl trim along the edges and add a greeting to finish.  Voila!


Mar #23 Ribbons and Pearls


What Was Used

Crafty Ribbons

Embossalicious Regal Swirl 8” x 8” Folder

Heartfelt Creations Feather Grass Flurish Pre Cut Set – HCPC 3435

Hobbyhouse Beaded Pearl Trim

Versamark Ink

Inkydoodles Stamps Set – Celebrate


Now it’s your turn and we are so looking forward to seeing what you come up with. xx

The challenge this month will end on 30th March at 8pm.  Good Luck!

And if you don't have your own blog , don't worry ,  remember we have a Facebook Page for you to post your entry onto. https://www.facebook.com/pages/Crafting-Musketeers-Challenge-BLOG/320703981385124

See The Crafting Musketeers blog for challenge rules and lots of inspiration from the Design Teams. 

We hope you have been inspired.

Thanks

for

Popping By

xx

Thursday 19 March 2015

Tonic Meets PaperArtsy – Home Sentiment Die Set


Hi Everyone

A very quick post today for you.

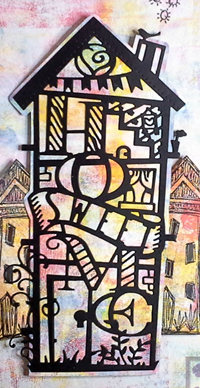
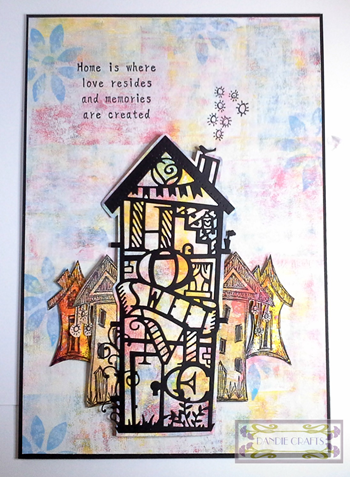
MJ has been playing with the NEW Tonic Home Sentiment Strip Die Set and her PaperArtsy stamps and paints to create an A4 sized project to be framed. 

MJ has used her Fresco Finish Chalk Acrylics and a variety of stamps to create a background paper which she matted onto black card and mounted onto a piece of chipboard.  She created a second background which she then stamped with the houses and cut out.  The ‘Home’ die was cut out of black card.  She drew around the outside edge of the die and cut this out to make her mat.  Glue the die cut on top.


Home and PaperArtsy - 19 Mar 15


MJ used 3D Glue Gel to glue the pieces into place on the piece.  To finish she added the verse and smoke from chimney.

Home and PaperArtsy - 19 Mar 15

Once again she is showing you how versatile Tonic Studios products are and how you can mix and match them with your other crafting stash. 

We hope you like it.

What Was Used

Tonic Studios Home Sentiment Strip Die Set – 772E

PaperArtsy Fresco Finish Chalk Acrylics: -

Yellow Submarine, London Bus, Glass Blue and Chalk

PaperArtsy Stamps – Eclectica (Lin Brown) – ELB13

PaperArtsy Stamps – Eclectica (Ellen Vargo) – EEV02

PaperArtsy Stamps – Eclectica (Lin Brown) – ELB04

PaperArtsy Stamps Mini – MN61


We hope you have been inspired.

Thanks

for

Popping By

xx

Wednesday 18 March 2015

3D Reach for the Stars Project – NEW Tonic Studios Dies


Hi Everyone

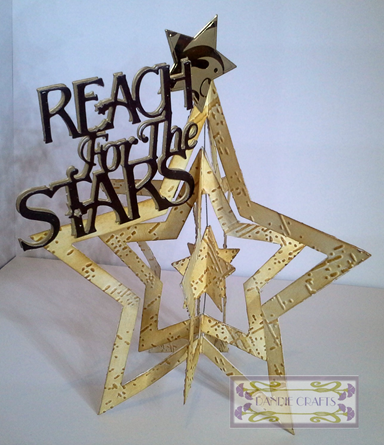
MJ has another Tonic Studios ‘Star’ themed project for you today but this time it’s free standing  and 3D!  She had already given you two card projects so she fancied doing something a little different from them this time.

This is actually an easy project but it takes a little time to do as you have to cut multiple frames out and glue together but that’s all there is to it.

Start off by cutting out (counting from centre die) four frames made from dies 9 and 7.  Then cut 4 frames from dies 6 and 4. and lastly cut 4 solid pieces from die 2.  Run all pieces through an embossing folder and ink over with Distress Ink. Score each star in half with point at top and fold.  Glue the large framed together leaving on edge unglued.  Repeat for the small frames and the solid star shapes.  Cut a length of thin jewellery wire or ribbon and glue this through the centre of all the pieces (see below). Make sure all edges are now glued into place.  Before glue is completely dry twist the stars to face different directions.  Trim any excess wire. Cut out the sentiment twice plus an extra star and glue these into position.


3D Star - 19 Mar 15


What Was Used

Tonic Studios Star Layering Die Set – 528E

Tonic Studios Reach for the Stars Frame Sentiment Set – 27E

Crafters Companion Textures Art Collection Emboss Folder – Distress

Distress Ink – Brushed Corduroy


We hope you have been inspired.

Thanks

for

Popping By

xx
Star Struck with New Tonic Studios Die Sets


Hi Everyone

MJ is back up and running and hoping her mojo kicks into full swing this week for you all..lol xx

It’s a very exciting week with Tonic Studios launching new layering dies (on Create and Craft on Thursday 19th March as a One Day Wonder event) and three gorgeous new strip dies….something a little different in this bundle!  You’ll see as the week progresses as MJ shows you her projects using them. 

The first projects, and it’s a wee sneak peek, MJ has used the Star Layering Die Set.  She has so many ideas (and when doesn’t she) on how to use these!  I’m sure you’ll see these pop up time after time.

Star Layered Card….

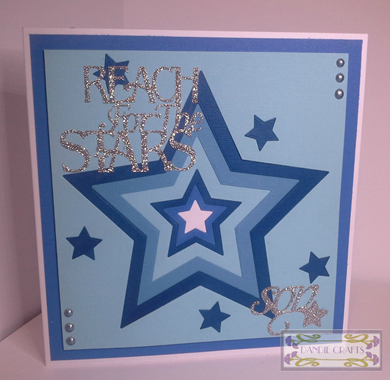
MJ cut six 6” x 6” squares of coloured card and one 6 1/2” square.  Starting with the largest star die she placed it into the centre of the square to create an aperture.  Using this first cut piece as a guide to centre the next size down she continued to cut each of the smaller squares.  Then she glued these layers together and then cut the smallest star into the 6 1/2” piece of card and glued all pieces to card blank. 

To finish the card MJ cut a sentiment out and the word ‘son’, some extra small stars and added Crystal drops.


Satr Son - 19 mar 15


Daughter Star Card….

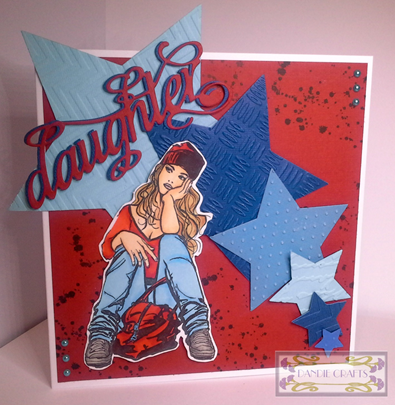
MJ wanted to create a card for a teenage (or inbetweenager!) and thought the stars would be great for this.  She used the stars that were cut from the first project and ran them through various embossing folders.  No waste!

MJ has stated with a 7” x 7” card blank. She then stamped a piece of red card cut at 6 1/2” x 6 1/2” and added to card front.  The image is from Indigoblu’s new range of stamps designed by Kay Halliwell-Sutton which was coloured using alcohol pens. 

The stars were attached across front of card and the word ‘daughter’ was cut twice and offset to give shadow effect..  MJ used 3D foam to adhere the word and the stamped image.  To finish she added some pearls.


Star Teenager - 19 Mar 15


What Was Used

Tonic Studios Star Layering Die Set – 528E

Tonic Studios Family Members Die Set 2 – 607E

Tonic Studios Reach for the Stars Frame Sentiment Set – 27E

Tonic Studios Nuvo Crystal Drops – Wedgewood Blue – 660N

Indigoblu Stamps – Lost in Thought – IND0132PC

Paperartsy Mini Stamp – MN72

Archival Ink Black/Alcohol Pens


Please tune in to Create and Craft TV on Thursday 19th March for lots of inspiration, hints and tips with the lovely Jo Austin.

We hope you have been inspired.

Thanks

for

Popping By

xx
Tuesday 10 March 2015

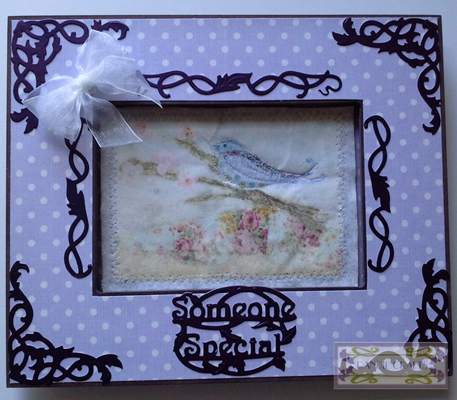
Someone Special with Tonic Studios – A Gift for Mother’s Day


Hi Everyone

At last it’s looking a lot like Spring outside….thankfully, but it is still chilly!

MJ hasn’t been around much over the past three weeks as she has had her gallbladder removed but she is starting to come back to her crafting now.  She has managed a little project for you today just in time for Mother’s Day.


Someone Special Bird Picture Mar 15


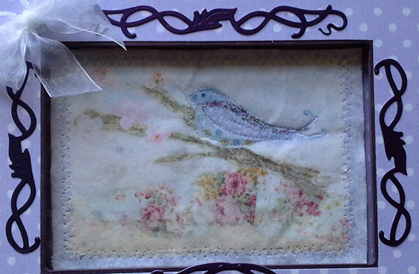
MJ took a blank MDF frame kit from her stash (actually she had forgotten she had had it at all!) and covered it using a printed paper from Crafters Companion Halcyon Days CD.  She also printed the bird topper onto white velvet paper, attached some light wadding to the rear and then stitched edges and the bird.  This was glued into the centre well. 


Someone Special Bird Picture Mar 15


Next MJ die cut four corners, the sentiment and three borders using the Tonic Studios Art Nouveau Set which she loves!  Two of the borders were trimmed down to fit the shorter sides.  All elements were glued into position using the Nuvo Glue Pen – so handy and it sticks well too.

MJ hopes you like this quick and easy gift idea.


What Was Used

Tonic Studios Art Nouveau Collectables Die Set – 182E

Tonic Studios Nuvo Glue Pen Medium – 203N

Crafters Companion Halcyon Days CD

White Velvet Paper

Light Wadding

Mini Sewing Machine


We hope you have been inspired.

Thanks

for

Popping By

xx