Pages

Friday 17 January 2014

Inky Doodles Stamps, Glue and Seal and Distress Inks–Trio of Trees Card


Hi Everyone

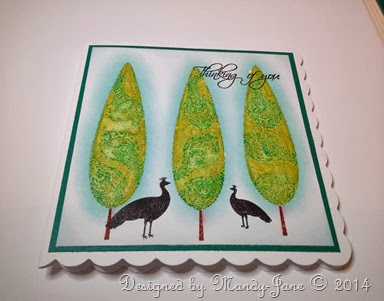
Today MJ has been playing with her new Inky Doodle Stamps and this time has chosen to use the ‘Topiary’ set.  She loves this set as there are so many elements to it and lots of things you can do with it.  She has chosen to use it as Trees (but she already has lots of other ideas of how to use it to share with you at a later date!).


20140117_203622


What MJ did:-

  1. Take a 5 1/4” x 5 1/4” square of white card for stamping.
  2. Using the large slim Topiary and the Peacock feather stamps.  Ink the Topiary with Peeled Paint ink and the feather with Peacock Feathers.
  3. Next stamp the feather onto the top of the inked Topiary stamp and create a pattern as in picture above (this is called ‘Kiss Stamping’).  Then stamp on to the white card.  Repeat twice more in a row.
  4. Stamp the small tree trunk at base of each tree using Aged Mahogany.
  5. Take a small paintbrush and paint the top of the tree with the Glue and Seal.  Be careful not to go over edges of image.  Dry with heat tool.
  6. Use Tumbled Glass ink and ink blending tool to add the blue to tree edges by blending outwards from centre of tree to create halos of colour. Gently buff away excess ink from trees.
  7. To finish stamp the large and small peacock and wording stamps using Black Archival ink.
  8. Mat and layer to suit.  Enjoy!


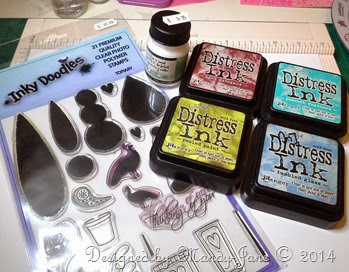
20140117_204345


What MJ Used: -

Inky Doodles Stamps – Topiary Set

Distress Inks – Peeled Paint, Peacock Feathers, Tumbled Glass and Aged Mahogany

Archival Ink – Jet Black

Ink Blending Tool


We hope you have been inspired.

Thanks for Popping By

xx

Thursday 16 January 2014

Inky Doodle Stamps, Distress Inks and Wow Powders


Hi Everyone

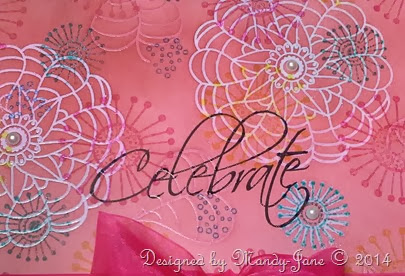
MJ has done another quick and easy card for you tonight using Inky Doodles Stamp Set – Celebrate.  Yep she could not resist getting another set and so soon!!  There’s no stopping her she loves her Inky Messy…lol


20140116_214835


What MJ did: -

  1. Cut a 5” x 5” square of white card for stamping.
  2. Select 3 smaller stamps from set and create a design to cover card using Distress Inks; Picked Raspberry, Salty Ocean, Peacock Feathers and Squeezed Lemonade.
  3. Then go over entire stamped piece lightly with Peacock Feathers ink.
  4. Next take the large floral stamp and stamp randomly over stamped panel using Versamark Ink.  Add clear embossing powder and heat.
  5. Once the embossed images are cool take Aged Mahogany DI and colour over entire surface until you are happy with the blend.  Buff ink from embossed areas.
  6. Use Archival ink to stamp the Celebrate image.
  7. All that’s left to do is mat and layer to suit and add ribbon and pearls.


20140116_214835


What MJ Used: -

Inky Doodle Stamps – Celebrate

Distress Inks – Picked Raspberry, Squeezed Lemonade, Peacock Feathers,

Salty Ocean, Aged Mahogany

Archival Ink – Black

Versamark Ink

WOW! Embossing Powder – Clear Gloss


We hope you have been inspired.

Thanks for Popping By

xx
Wednesday 15 January 2014

Inky Doodle Stamps, Distress Ink Markers and White Embossing Powder–Butterflies Card


Hi Everyone


MJ has been having a quick play with the new Inky Doodle stamps that arrived in store yesterday. She just couldn’t resist taking a set home to play with!


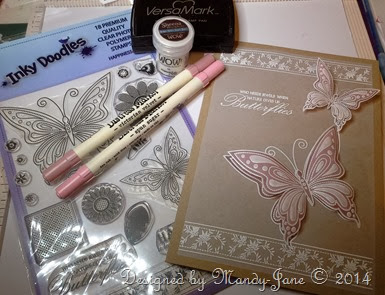
She’s kept it nice, simple and clean using vellum, white embossing powder, Distress Ink Markers and Kraft card.


20140115_222916
 

What MJ did: -

  1. First cut a piece of vellum measuring 5 3/8” x 7 3/4”.  Then using the floral border in the ‘Happiness Is’'…’ stamp set and Versamark Ink stamp at top and bottom edge of vellum.  Add white embossing powder and ‘cook’ with heat tool.
  2. Next take the large butterfly stamp and stamp above bottom border with Versamark, add white powder and heat.  Repeat process for wording stamp.
  3. Stamp a large butterfly and a small butterfly onto vellum with Versamark and once again using the white powder, heat.
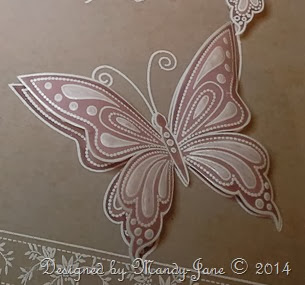
  4. Take the Distress Ink Markers (here MJ used Spun Sugar and Victorian Velvet) and colour all butterfly images from the reverse.  Leave to dry.
  5. Taking the large and small butterfly images use an embossing tool gently from reverse to add the white shading.  Then cut these 2 images out.
  6. Fold an A4 piece of Kraft card in half to form your card blank.  Using Crafters Companion Stick and Stay (Red Can) cover the reverse side of the stamped vellum piece and stick to front of card.
  7. Shape the wings of the butterflies and then use 3D foam pads/glue gel to adhere to the front of the card.
  8. If you wanted to you could colour behind the border too to add more colour. 
  9. Decorate to suit.


20140115_222916


Materials Used: -

Inky Doodled Stamps – Happiness Is

Distress Ink Markers – Spun Sugar and Victorian Velvet

WOW! White Embossing Powder

Crafters Companion Stick and Stay (Red Can)

Translucent Vellum – Clear

Kraft Card


We hope you have been inspired.

Thanks for Popping By
xx
Thursday 2 January 2014

New Sneak Peek – Bebunni Love– Crafters Companion–Launching 3rd January at 12 noon on Create and Craft TV


Hi Everyone
 
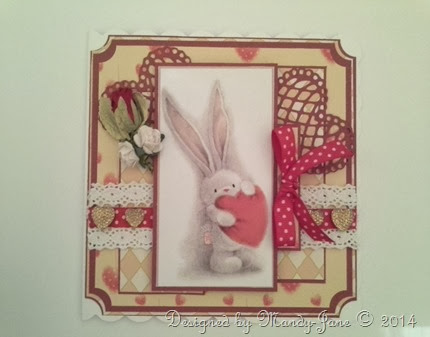
Mandy-Jane has one last quick post showing you another card she has made for the launch of the NEW Bebunni CD’s and Stamps.  Today Bebunni Love is featured.
 
MJ once again had such an array of printable goodies on this CD that it took quite a while to make a decision!  Which papers and which topper?  Her brain was hurting!…lol xx 
 

20131217_014914

 
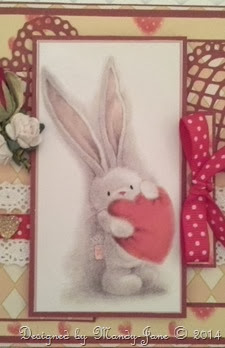
In the end she chose a muted palette of rusty toned reds and the cute portrait Bebunni topper together with Core’dinations cardstock.
 

20131217_014914

 
To finish the card she added die cut hearts, lace, spotty ribbon and sparkly hearts from her stash.
 
Please watch the shows on Create and Craft 3rd January – 10th January.  See schedule below for details.


We hope you have been inspired.
 
Thanks for Popping By
xx

Wednesday 1 January 2014

Lavinia Garden Spirit Stamp and Distress Ink Marker Pens


Hi Everyone

Well Mandy-Jane has been playing with her birthday present – a full set of Distress Ink Marker Pens….woooo hoooo!  Up to now MJ has been using her DI’s for almost anything she creates so wanted to play straight away to see that she could get same results and of course she did with her stamping.

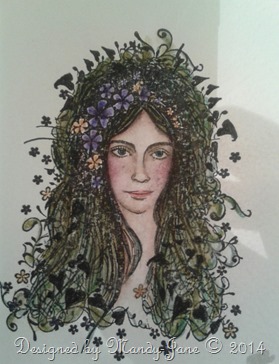
She absolutely loves Lavinia Stamps and owns, well let’s say a few (!) and is always using them.  This time MJ chose to use the Garden Spirit stamp.  She loves the details of this one but was asked recently by a customer ‘But how would I colour her?’ – now MJ, she loves a challenge! So this is for Chris xx.


20140101_172456_resized


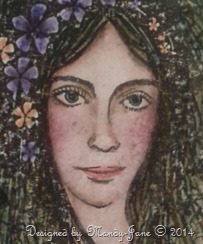
MJ first lay down around the outer hairline some Tattered Rose and blended it in towards the centre of the face using a barely damp paint brush.  Next she took the Vintage Photo and went around the edge of hairline where the original colour was added.  Blend in around the face.  She also added some Vintage Photo at the sides of the nose and inner corners of eyes.  Then back in again using the Tattered Rose and blended once more in towards the centre of the face. 

20140101_172456_resized


**it is better to add layers of light colours than to add one layer of a darker colour **

Very lightly she then went around the hairline with the Walnut Stain and blended in.  Take the Aged Mahogany (you do not need a lot!) and add some cheek colour.  Blend well!  The lips were coloured with Worn Lipstick and the eyes with Evergreen Bough.

MJ thought as she is the Garden Spirit that she would give her green hair.  This was a mix of Crushed Olive, Evergreen Bough and Iced Spruce. The flowers were done with Milled Lavender, Dusty Concord and Scattered Straw.

MJ is no expert colourist but this is how she likes to do it. 

We hope you have been inspired.

Thanks for Popping By

xx
Sneak Peek–BeBunni Baby–Crafters Companion–3rd Jan Create and Craft TV


Hi Everyone
 
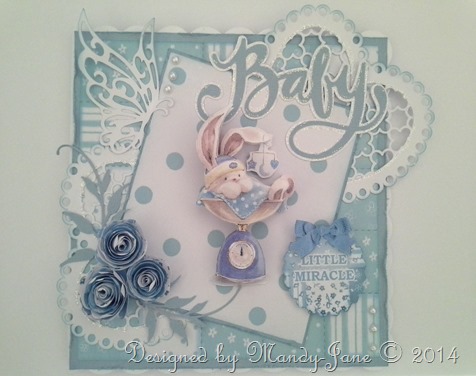
Today Mandy-Jane is sharing with you one of the cards she has made for the launch of Crafters Companions new additions to the BeBunni range of goodies; Be Bunni Baby and Love.  MJ is starting with Baby.
 
The new images on the CD’s and Stamps are gorgeous and give you endless elements to work with.  It was hard to make a decision which ones to go for!!  But she thought she would like to work with blues this time.
 

20131217_014950


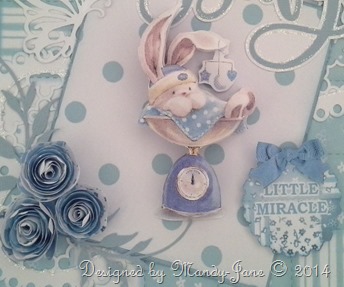
MJ has used decoupage elements printed onto Crafters Companion Decoupage paper together with some beautiful patchwork and spotty backing papers printed onto satin finish paper.  The flowers are taken form the embellishments section on the CD as is the ‘Little Miracle ‘ tag.  It was just a matter of using some mats and a couple of die cuts to finish the project.  MJ also added an insert and embellishment to the inside of the card but forgot to take a photo (typical..she has a sift for a memory..lol).
 
 
20131217_014950
 
 
MJ Used: -
 
BeBunni CD – Crafters Companion
Printable Decoupage and Satin Finish Paper – Crafters Companion
Core’dinaiton Card – Reflecting Pool
Joy Craft Butterfly Die
Heart Die Cut – Silhouette Cut File
 
 
Please make sure you watch the show listed on 3rd January on Create and Craft TV where you will see some amazing samples made by the other Design Team members – fantastic!
 
We hope you have been inspired.
 
Thanks for Popping By
xx